
Summer seems a distant season now . Lately, it has been really cold and autumn is definitely here.
It is always lovely to remind ourselves what we have been up to in the summer.
Remember what Lisa always says ? ” Those who document their adventures have twice the fun”
So, Here we are…
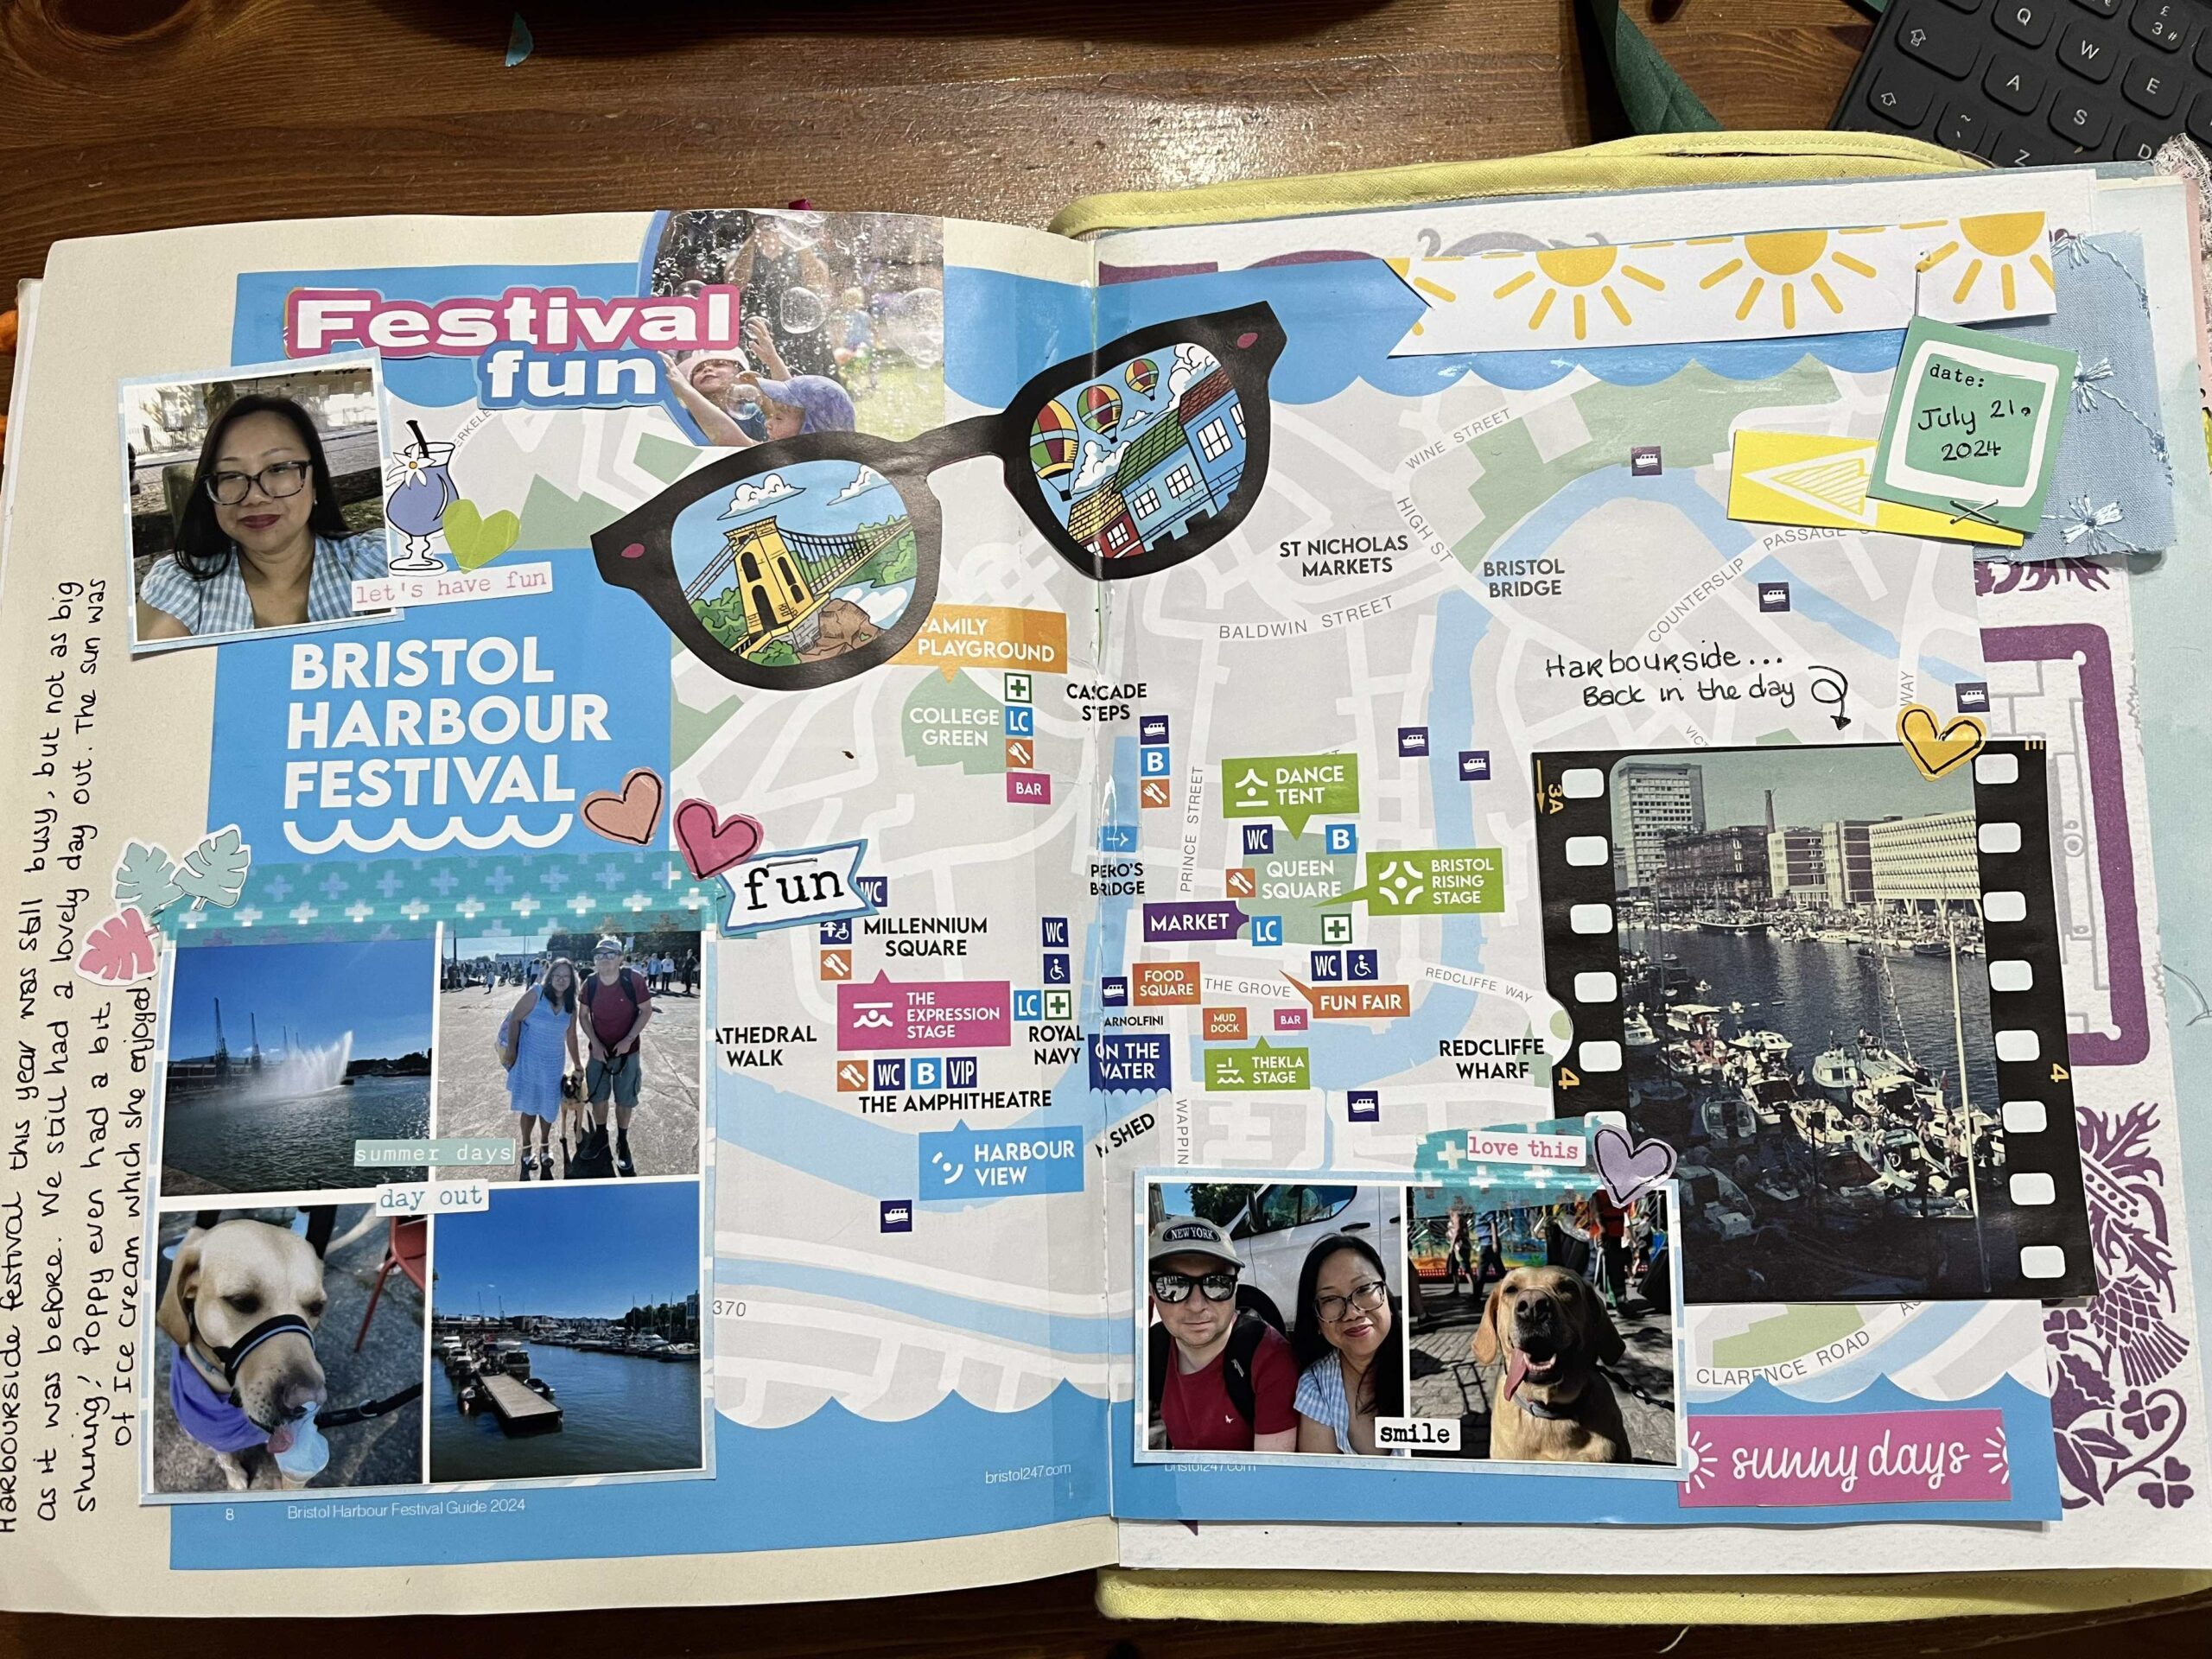
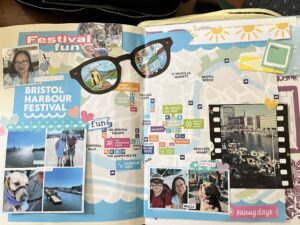
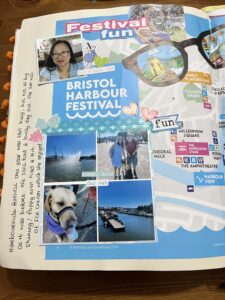
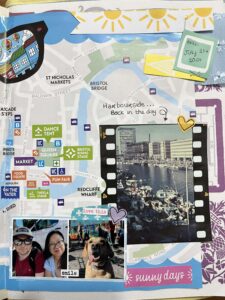
The Bristol Harbour festival happens every year, and we haven’t been for a few years.
The festival involves a lot of water shows , carnival acts in castle park , food , drinks and lots of things to see.
We decided to go with a few friends this year. I forgot how fun it was ! There was so much to see.
The weather was lovely and warm .
I wanted to document this on my giant journal . So I chose the photographs that I would like to include in my journal and printed them using my Selphy printer.
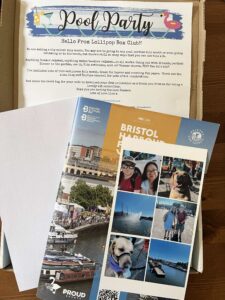
Looking at the colours of the photographs, and the festival involving water , I thought that the Poop party kit would be good to use for my layout.
I always make sure that I collect as much ephemera as I can to use for my journaling. For this one , I managed to get a free festival book. There are a few images in the book that I wanted to use for my layout.
Creating the background
There was a festival map in the booklet so I tore that off and used it as my background.
The right hand page was smaller than the eft , but that didn’t hinder me from using it. I still pasted the map on to the page so that my layout sits on 2 pages. I had to put a clear tape in the middle to connect the 2 pages together.
I have also cut out 3 images from the booklet to use them later on as embellishments on my page.
I particularly love the image of the old habourside back in the days. It just looks so different nowadays.
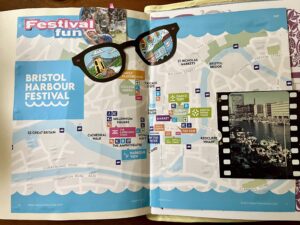
The old harbourside photograph was backed with a card stock and I glued it at the edge of the left hand page , slightly hanging out of the page. I want it to appear like a tab for the page.
Cutting the photographs
Before cutting the photographs , I decided which ones to cut out singly and which ones to cut out as a group.
I then used one of the papers included in the kit to back my photographs. The lighter coloured paper seemed the most appropriate choice.
Deciding where to place them was challenging as I really didn’t want to cover so much of the map. I placed the photographs in different places until I was happy with the placement before I glued them in place.
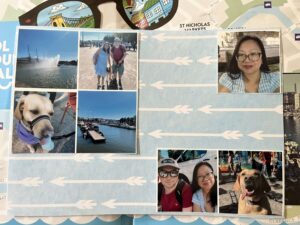
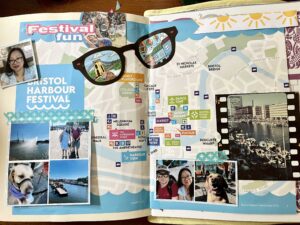
I decided to make one of the photographs flip up , so that I can journal underneath it. So , I used some washi tape to do this.
So , far I am loving the blue and pops of pinks and green on this page.
Finishing the Touches
No journal page is complete without all the finishing touches.
I used some of the stickers , cut apart card and cut apart washi strip included in the kit to add some finishing touches to my journal page.
There were also some coloured rectangular stickers that I cut into little hearts to use as embellishments too.
There was also a light blue trim that was included that I cut a piece of to use as a tab on to this page.
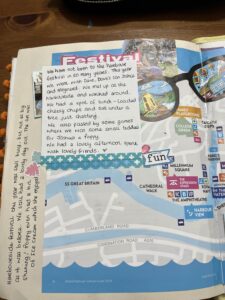
Journaling on the page
Now time for the journaling !
As mentioned earlier , I hinged one of the photographs to flip up so I can journal on the back of the photo.
I also journaled on the space at the left hand side of the page.
And you know that I like writing a bit of a note and then drawing a curly arrow to point to the photograph that it corresponds to.
I loved how this page turned out ! The kit has complimented this layout page.
I may not have used much of the kit , but it truly has helped finished this journal layout.
Let me know what you think .
Do you also use collected ephemera on your journal layouts? I would love to know.
Till the next blogpost my lovely Lollipopers!
Lots of crafty hugs , Sheryll

Leave A Comment