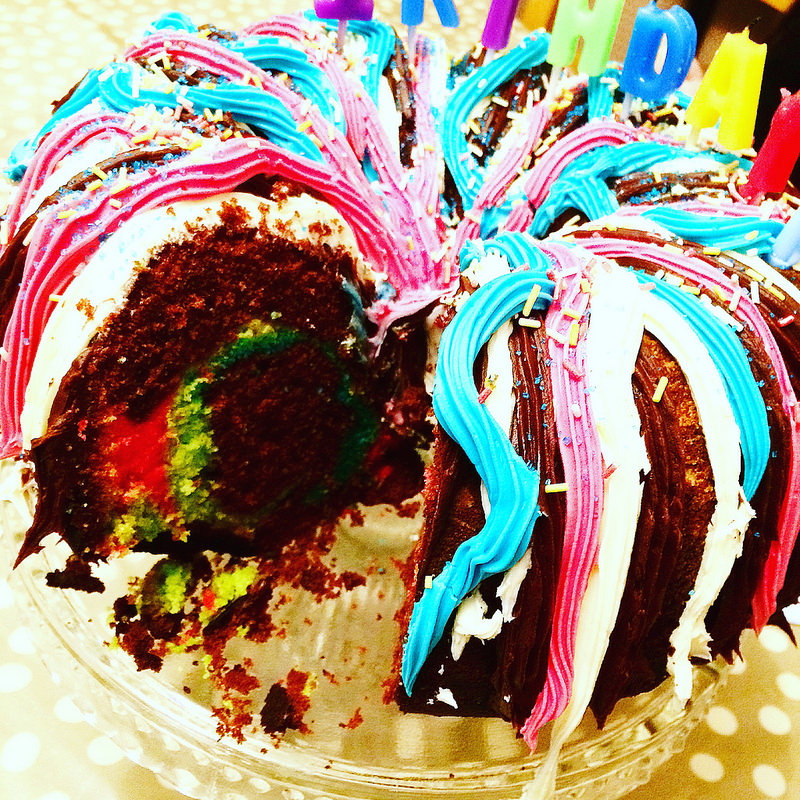
Today I have a really fun and very easy celebration cake to share with you.
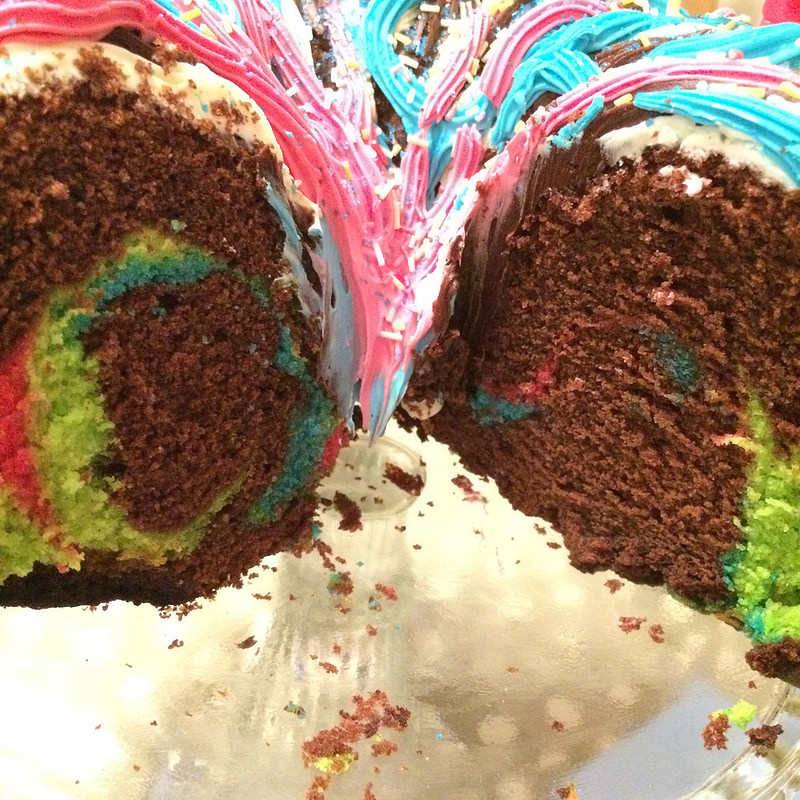
It’s Chocolate Orange Rainbow Cake, but the recipe can easily be adapted. You cut it to reveal the rainbow centre. It’s such a delicious cake. I made this one for my youngest’s birthday this year.
I chose to make mine in a bundt ring (I’ll show you in a sec), but you could also make this in a normal cake tin or even cupcakes.
You need to make up 2 separate cake mixtures to create the rainbow effect.
So the chocolate cake ingredients are:
85g/3oz Self Raising Flour
4 tbsp Cocoa Powder
110g/4oz Caster Sugar
110g/4oz Marg
1 tsp Baking Powder
2 Large Eggs
1 Orange
Then plain cake recipe:
175g/6oz Self Raising Flour
175g/6oz Caster Sugar
175g/6oz Marg
3 Eggs
Plus brightly coloured food colourings.
My bundt tin is very large, so I doubled the quantities.
For the frosting on the top, I do confess to buying Betty Crockers ready made frosting. A tub of Chocoate Fudge and a tub of the Vanilla. I can’t stand the stuff, it’s so sweet (I don’t have a sweet tooth) but the rest of the family love it. It’s lovely and thick and great for squeezing through a piping bag.
Time to bake.

Start by greasing your tin well. This is my bundt tin. I love the shape. These cakes remind me of when I lived in Germany. My German Aunts would often bake this style of cake.
The oven needs to be set to 170c/325f

The 2 types of cake need to be made separately but using the same method.
For the plain sponge, beat together the sugar and the marg until pale and fluffy. Beat the eggs in a small dish and add gradually along with the flour so it doesn’t curdle (mix in the baking powder with the flour). Keep doing this until the egg and the flour have been completely mixed in and the cake batter is smooth. Pop to one side.
The chocolate is pretty much the same but sift the cocoa in to the flour first before adding in with the egg to the sugar and marg smooth mixture. Once you have your chocolate cake batter, grate the zest of your orange in to the batter and give it a good squeeze too and mix in. Pop to one side.

Now taking the plain cake mix again and split equally in to 3 dishes. These will become the colours.

These are my favourite food colourings. They are a lovely thick paste. The cheaper food colourings that you can buy are just a liquid and can sometimes water down the mixture a little too much and I find the colours aren’t so vibrant. I just take a small amount of the paste from these on the end of a skewer and that’s all I need. Just add until you are happy with the colour.

I chose 3 colours that would stand out against the chocolate sponge very well.

It’s now time to layer up.
Start by adding half of the chocolate mix on the bottom of the tin.

Then a little of one of the colours.

And continue….

Until all the coloured is used up and finish with the rest of the chocolate.
And then bake for about 35 mins depending on if you double the quantity and the depth of your cake. I think this one took about 45 mins in the end. Just keep a close eye on it and pop it back in if it’s not quite ready. It needs to be firm to touch (not wobbly) and check by sticking in a thin skewer in to the thickest part and you want it to come out clean and not covered in cake batter.

Leave the cake to cool well before trying to remove it from the tin. I’ve broken many a cake due to my terrible impatience.

When the cake is completely cool you can start to frost. I had different piping bags for the different colours and started with the chocolate fudge. Staring from the centre and piping outwards.

Then the vanilla and adding some coloured. (I added some of the colouring to some of the vanilla frosting) Just filling in the gaps until the cake in completely covered.

Once frosted I sprinkled over sprinkles and edible glitter. It looks so cool and is such a fun surprise when it’s cut.

If you don’t like chocolate then you can just use vanilla instead. It will work just as well. Keep half vanilla and colour of the rest to layer with.
As you can see, it’s very easy. Just regular cake mixes, layered. But it’s so effective and yummy too.
Happy baking and enjoy your celebrations!!


Leave A Comment