Pocket Letter By Danielle with video
Hiya Lovelies!
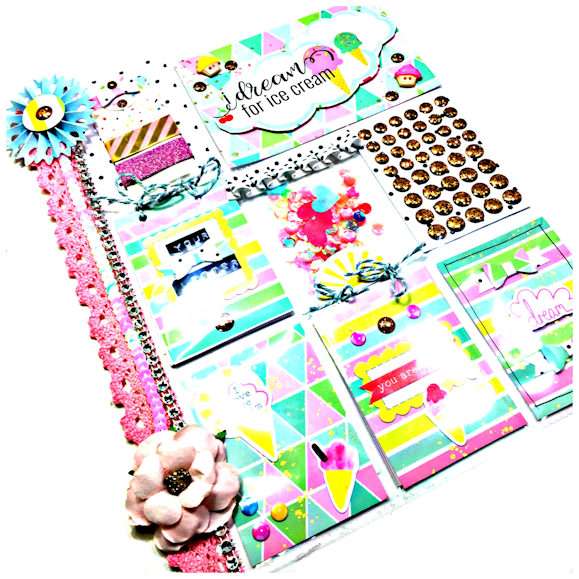
Today I have a Pocket Letter for you! It has been ages since I have done one of these so I thought I’d use the August kit to do one.
I’m sure you guys know what a pocket letter is, but let me explain for those of you that don’t. Created by Janette Lane, a pocket letter involves filling a trading card sleeves with goodies and a letter. You fill the pockets with a card or paper, which is usually decorated in a particular theme, and add into the pockets little goodies like tea, ephemera, stickers, washi samples, and other treats. There are loads of ideas out on Youtube and instagram of different layouts, themes and ways to fill and decorate the pockets.
Here’s how I decorated mine.
First I measured out the patterned paper from the kit to a 2 1/2 inches x 3 1/2 inches. I love the look of decorating the outside as well so inside of decorating two cards to put in the pockets, I stuck a larger on over two of the pockets.
I made little embellishments out of the paper using a Fiskars bow punch to make little cute bows and rosettes using a Tim Holtz rosette die with my Bigshot die cutter.
I created a shaker pocket by inserting the sequins from the kit and sealing it with my glue gun. Most people use a fuse tool but I, for the life of me, can’t get mine to work properly and it always becomes un-fused. I find a glue gun works perfectly fine as I intended to decorate it anyway.
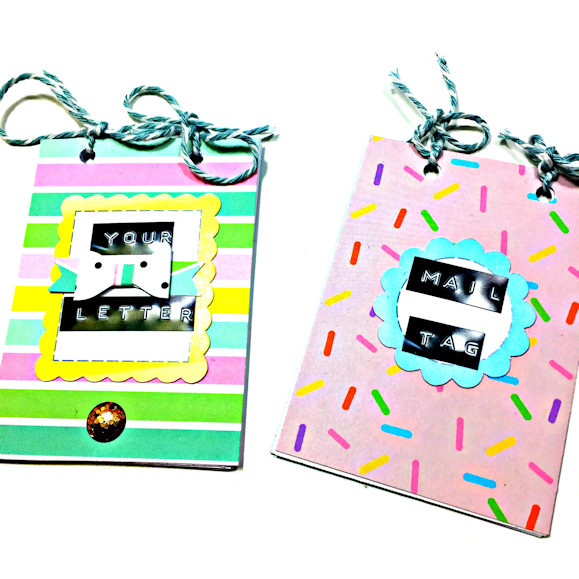
For the letter, I decided to make a little tied letter book as I find I waffle on for ages in my letters and if I fold my letter it makes the pocket really fat! So instead I cut out some of the paper and some normal printer paper to the pocket size and punch it with holes so I could tie it up with twine. I find when I do this it is less bulky and I can add more paper if necessary.
I did the same for the mail tag.
Here is a process video for how I made it!! I hope you enjoy!!
Ta-ta for now!!
Danielle

Leave A Comment